Tag Archives: Allison

Soup is the Answer

I have not missed doing the school bus run at all. Not one little bit. When I emailed my friend Amy to say that I’ve been sleeping in until 7:30 she thought I was goofing on her, but I wasn’t. Doing the bus run means you have to be up by 5:30 – 6:00 if you oversleep. So staying in bed until half past seven seems luxurious. Of course not having to do the bus run is akin to that proverbial double-edged sword. No bus run means no kids are at home. So a couple of  weeks ago we went to see Russell. For no reason. Just to say hi and hang out before he went to calculus. It was fabulous to see him and made me feel very, very short.

Myself and the tall one


Maybe this transition to being an empty nester is easier for me since both our kids chose to go to colleges near to where we live. Not so close they could live at home, but close enough for us to see them, take them out to lunch, and then be back in time to let the dog out. Simon’s Rock is just over the Berkshire mountains and UNH is a short train ride along the Connecticut River. I’m sure I’d be handling this shift in parenting and family differently if they were going to college somewhere in California or Canada. Lucky for me they aren’t.

As our offspring have settled into their semesters, Shawn and I are figuring out how to settle into our new family size of two plus the dog. Much has stayed the same – work, chores, taking care of the dog. Other things have shifted, the afore mentioned bus run, bedtimes and meals. Bedtime now has a glorious fluidity. If we’re tired at 8:30 we can go to bed. Or we I can stay up until 3am binge watching episodes of Outlander. It helps that we’re both self-employed and can write our own schedules, which though it usually means working seven days a week we can choose what time on those seven days we work. Meals, or more specifically dinner, are one of the biggest changes, which I wrote about in my last blog post.

It’s not just us. I’ve chatted with other empty nesters and they too find themselves having meals that aren’t really what I’d classify as proper meals. Gooey, stinky, oozy cheese smeared on bread with a glass of wine. Avocados sprinkled with Worcestershire sauce. Plates heaping with vegetables, just vegetables (try feeding that to most teenagers). Or a bowl of cereal if you had a big lunch. Those are some of the dinners we’ve been having. Plus the timing can be whenever we want it to be – 6, 7, 8 or even 9. While I never managed my Mother’s record of having dinner on the table by 6 every night for 20+ years (you rocked the dinner scene Mom!), I certainly tried never to make my kids wait until 9 before feeding them. It just wasn’t humane after a long day at school followed by sports and homework. With kids out of the equation an early dinner has changed. Sure there are days when we decide to nibble on something at 6-ish, but basically we eat when we’re hungry or when someone gets around to scrounging something up. Of late that something has included many pots of soup.

Not your grandmother's imatzo ball soup


Soup works in so many ways because it is endlessly flexible. Immensely adaptable. Satisfying to eat and easy to make. So get ready because I am going to bombard you with be sharing some of my favorite soup recipes as we slip into fall. There are already a few of my favorites on this blog like Laurie Colwin’s Black Bean Soup, my friend Marisa’s Ceci e Pasta or my go-to super-easy carrot soup. This go round will be my matzo ball soup à la Allison. Just so we can get the obvious out of the way – I am not Jewish. I did not grow up eating matzo ball soup. This is a shiksa’s version of classic Jewish soul food, using a recipe from my half Jewish-half Italian friend. I even use –gasp– boxed matzo ball mix, so sue me. Enough said.

Makings for matzo ball soup

As Allison explained to me the key to matzo ball soup is all about how your mother made it. If you had a mother who made her matzo balls light as clouds that is what you look for in the “perfect” matzo ball soup. On the other hand if your mom made them like lead shot puts then you will probably think only a heavy, sit-in-your-stomach matzo ball will fill the bill, or in this case, soup bowl. Having grown up in an Episcopalian, matzo ball-less house I had no preconceived notions of how they should or shouldn’t be. I fell in love with those not-so-heavy and not-so-light matzo balls my friend fed me thirty odd years ago.

Seltzer is the key to the perfect matzo ball

If you want to see some hilarious reactions to people eating Jewish foods for the first time check out this BuzzFeed video. I cracked up when one tester referred to matzo ball soup as “the gateway drug to Jewish food.” You have been warned.

Simmering the best matzo balls ever!

Not Your Jewish Grandmother’s Matzo Ball Soup

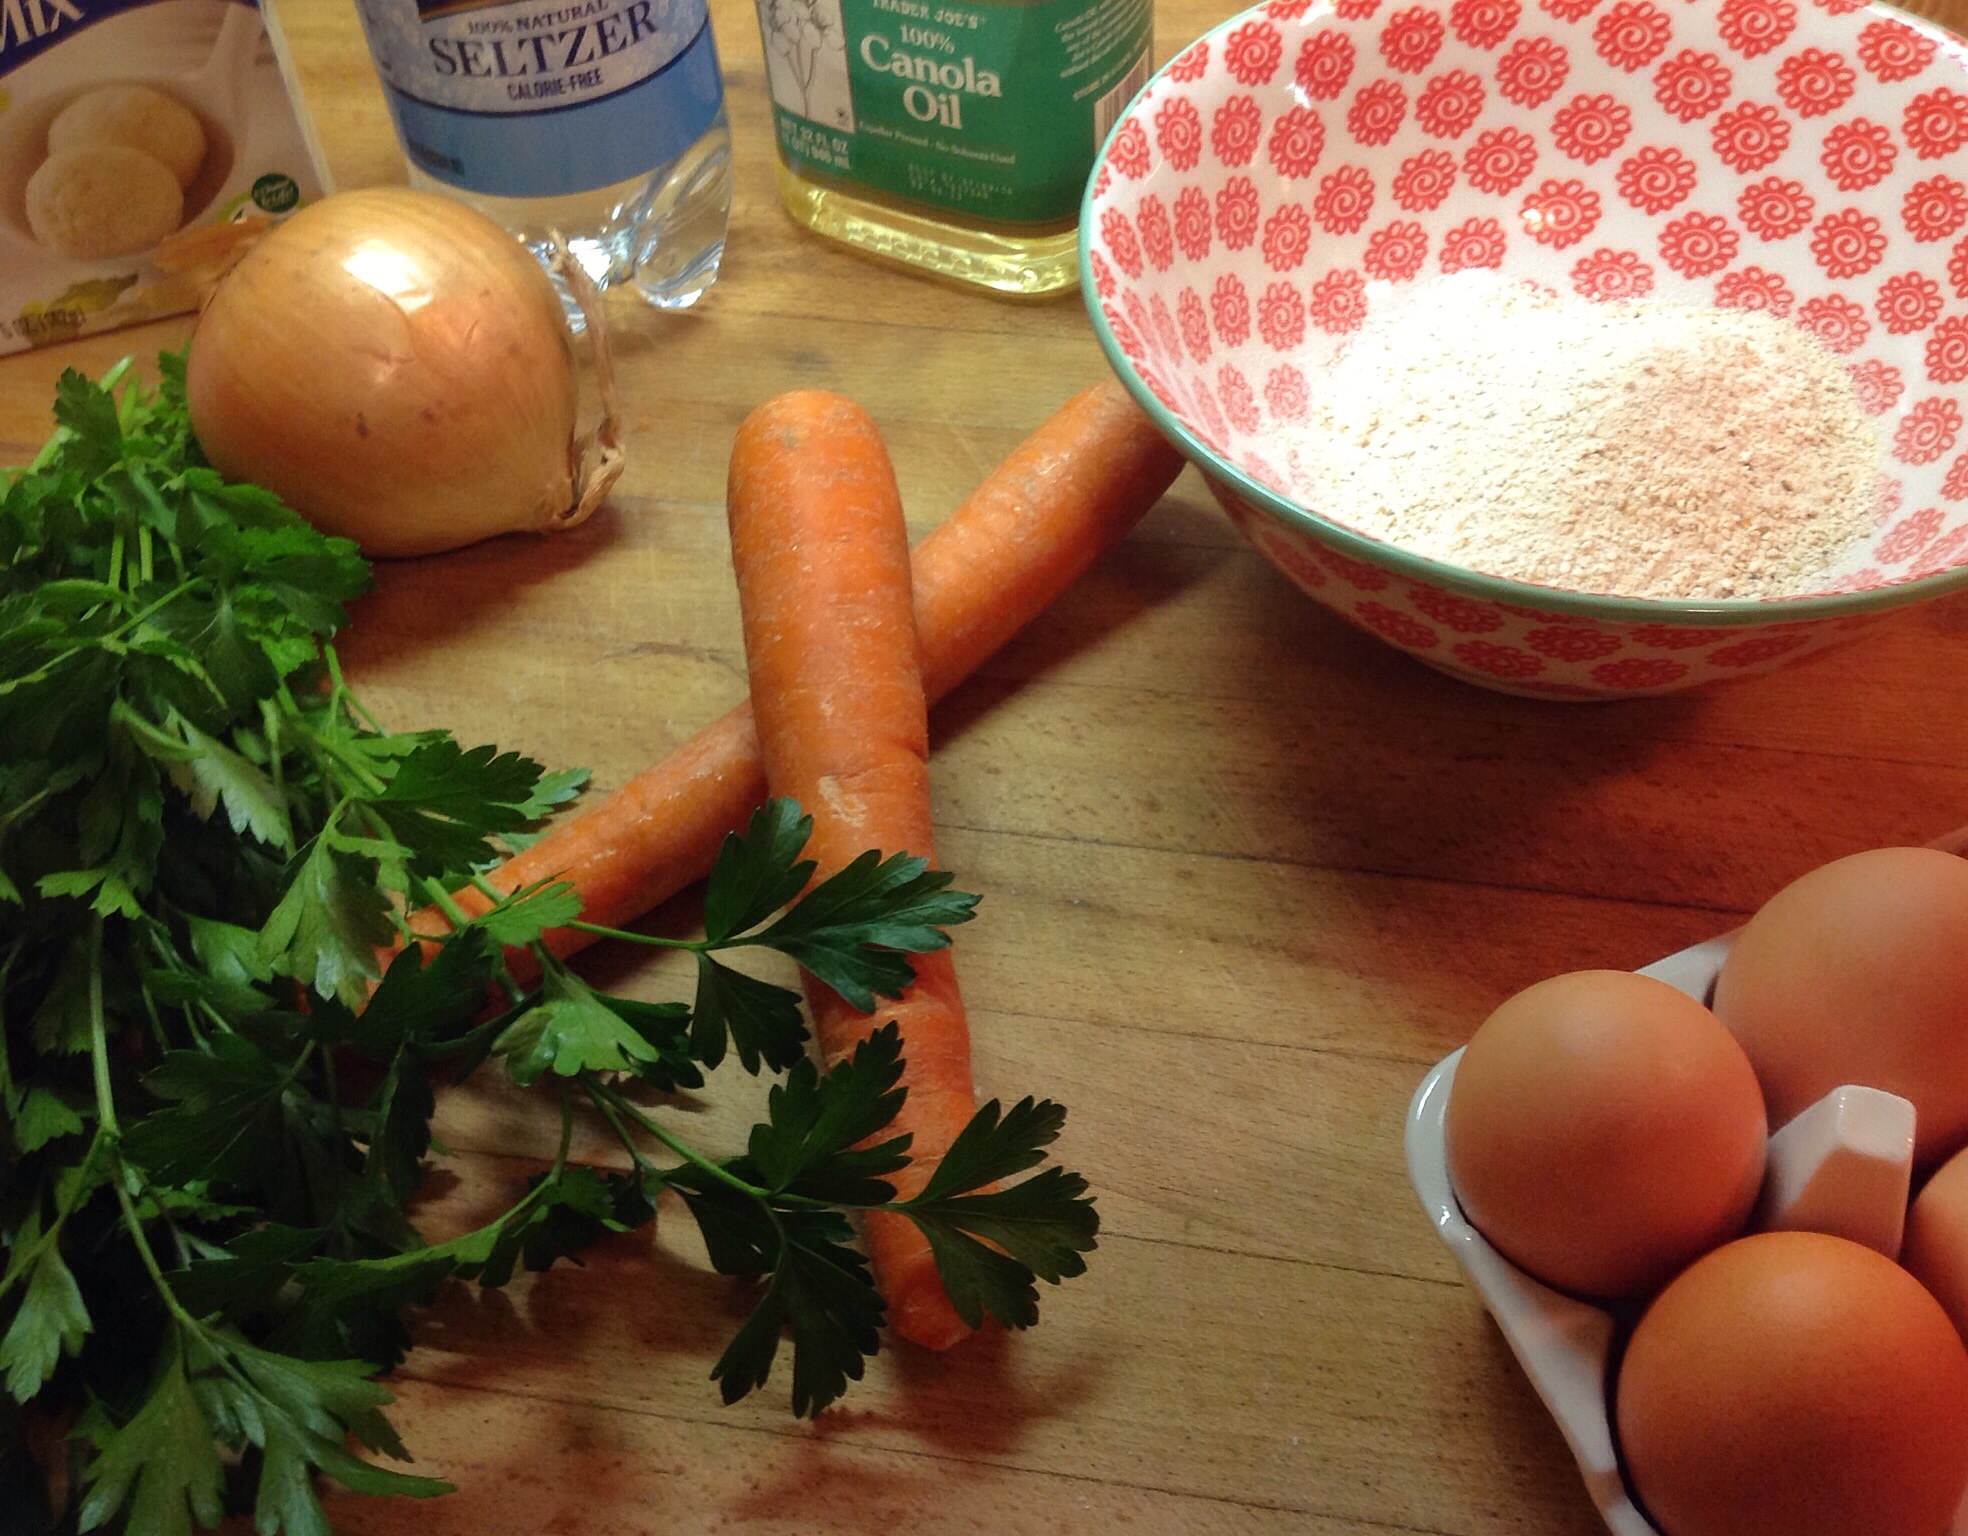
1 box matzo ball mix (I use Manischewitz)

4 eggs

2 Tablespoons vegetable oil

2 Tablespoons seltzer

2-5 Carrots, peeled and chopped

1 onion, peeled and diced

3-6 quarts chicken or vegetable broth* (I use home made chicken stock and add water to it, but you can use canned in a pinch)

Handful of chopped parsley (optional)

Couple of handfuls of chopped or torn cooked chicken (again optional)

Allison is in the in between matzo ball camp. Not super fluffy, but not heavy either. Her answer is to add some seltzer to the mix. It lightens things up, but doesn’t make them fall apart. These middle of the road matzo balls are what my kids have grown up on. So if you’re feeding a whole family, or don’t want leftovers half all the ingredients. Otherwise here’s what you do-

Mix the eggs, oil and seltzer together then whisk in both packages of matzo. Stir until everything is moistened and place the bowl in the fridge for 15-45 minutes, depending on how long it takes you to make the soup part.

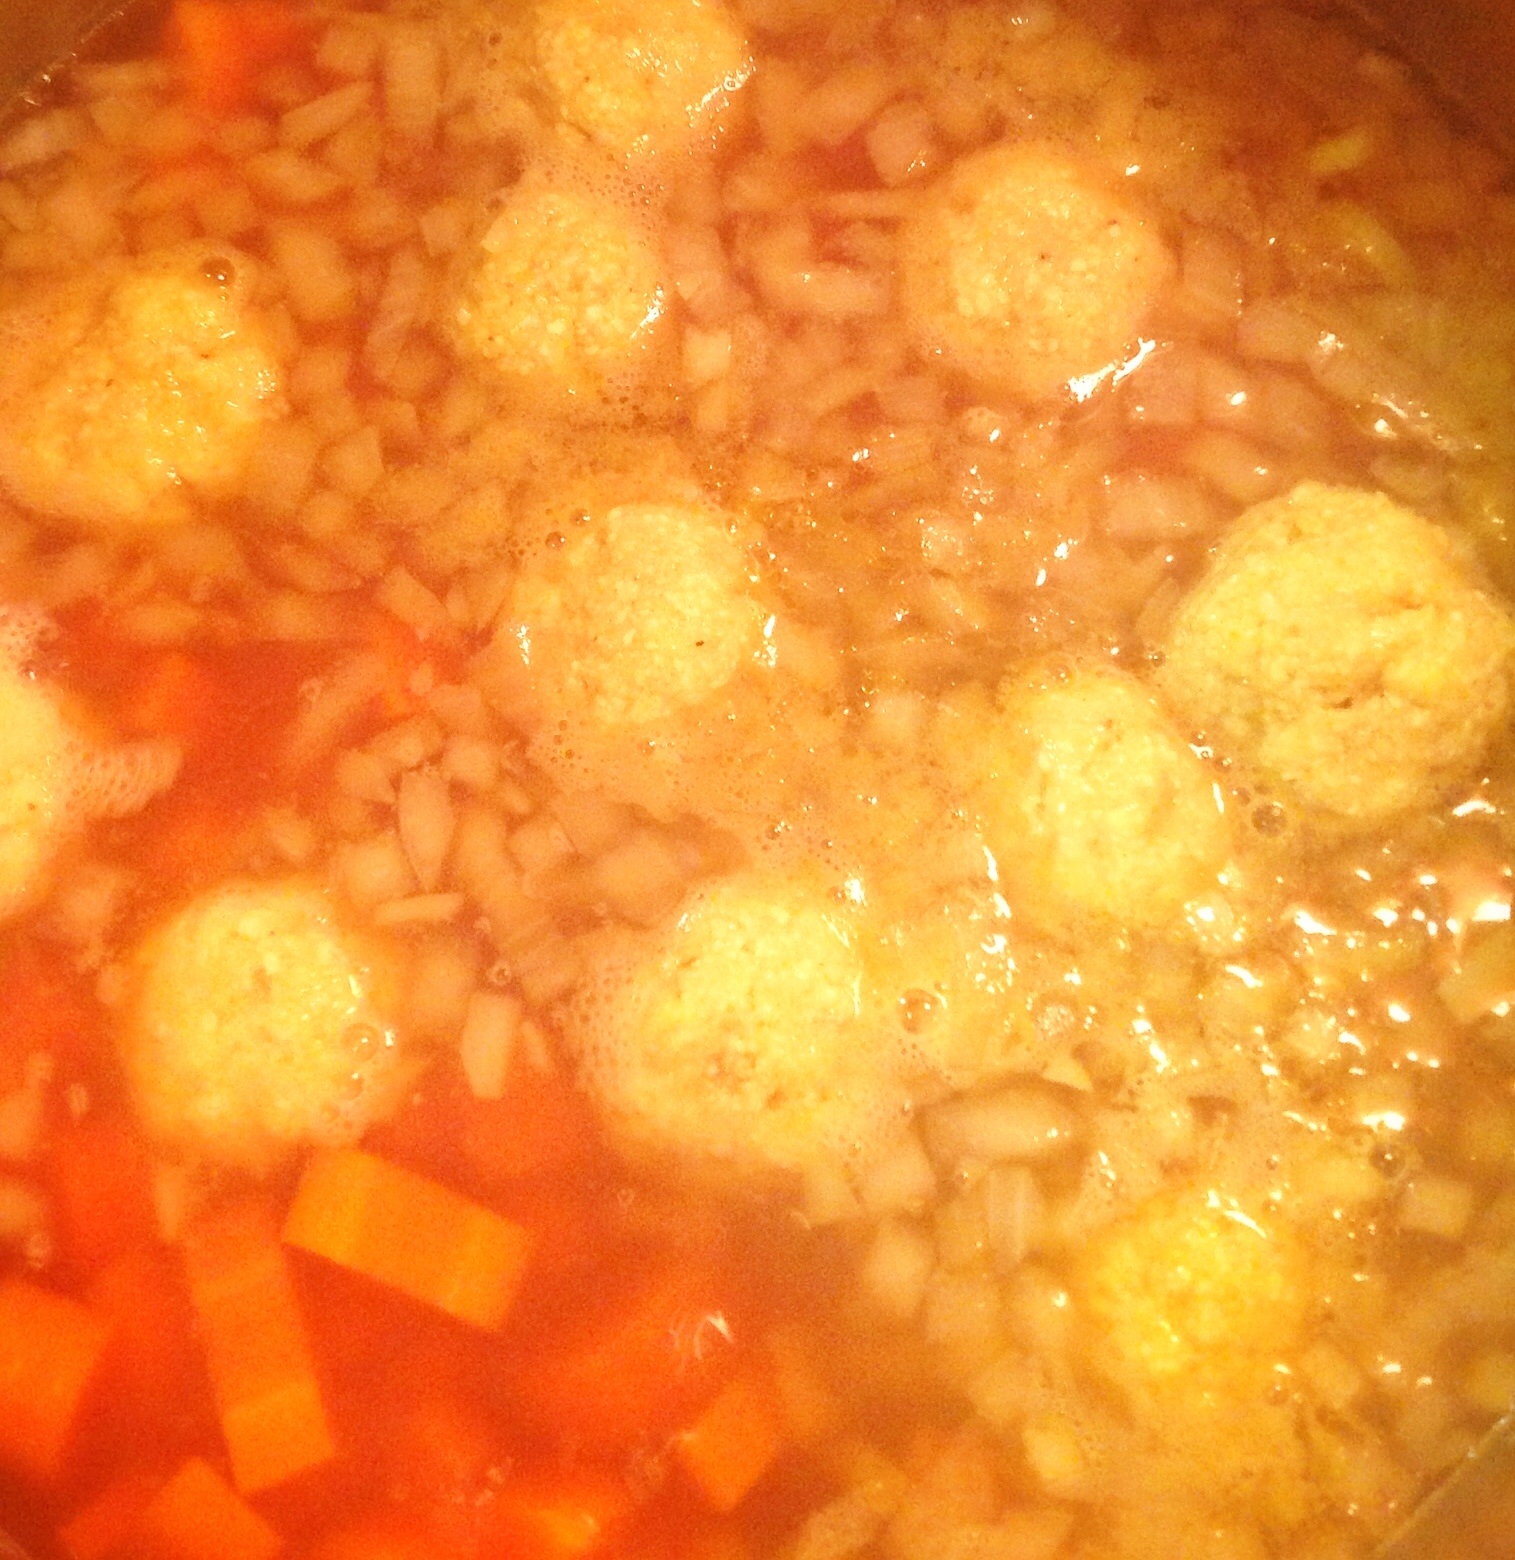
While the matzo mix is merging I add the chopped up carrots and onions into the broth and simmer everything until they are al dente, about 10-15 minutes. How much broth I hear you asking because you gave a pretty broad range of amounts. Well that depends. I like to cook my matzo balls right in the broth, which means they soak up a lot of broth. So I either start with what seems to be way too much broth, or I add a quart or two of water to my chicken broth, or I enjoy my broth-soaked matzo with a tiny bit of broth and a whole lot of matzo and veggies, sort of like dumplings. I can’t make those decisions for you. You have to decide what kind of matzo ball soup person you are. For even more options the package says to cook the matzo in a pot of salted water. It’s an option, but I don’t really see the point of dirtying up another pot and I’ve never tried it that way. All I can advise you to do is know thy self. Or experiment. There really are no bad answers.

Once you’ve got what seems to be the right amount of broth for you, and your veggies are partially cooked then it’s time to make the matzo balls. Wet your hands with water, scoop out some of the matzo ball mix and roll into a ball. How big? Again, that is a personal preference. I like mine the size of small oranges when done, so I start with matzo balls the size of giant golf balls. Some people like humongous matzo balls the size of a grapefruit. Again, you get to decide. Once you’ve found the right size for you, make them and plop them into the pot to simmer with the lid on. Fifteen minutes then I gently flip them over to simmer on their other side. If you’re going to add chicken to the mix throw it in at the turning point to warm up.

To serve ladle out as many mazto balls as will make you happy (or as many as will fit in your bowl), along with some broth and veggies and chicken if you’re having any. Sprinkle with chopped parsley if you’d like. It’s all pretty free form, and if you’re an empty nester than there are just the two of you and you can do whatever the heck you want to do.

*When I’ve known vegetarians are coming over I’ve made this with vegetable stock and it is delicious too. Obviously leave out the chicken if you’re making a vegetarian version, but don’t try to sub in tofu or tempeh. I think just straight veggies, matzo balls and broth will be fine. If you’d like, you could boost the amount of vegetables you use and add a stick or two of celery.


5 Comments

Filed under 50 Recipes

Allison’s Brisket

I’m one of those people who, when surrounded by a strong accent, will start to unconsciously mimic what I hear, which is ironic (or pathetic, depending on your point of view) since I am not a very good mimic. When I lived in Scotland my speech became peppered with “Och aye” and “A dinnae ken” and my pronunciation for words like aluminum and vitamin changed. My American family thought I’d developed a serious Scottish accent, though the Scots were not fooled one bit and referred to me as the wee American lassie. It happened again when my husband and I took our kids down to Louisiana to help with hurricane Katrina recovery. Despite being a lifelong Northerner, I developed a bit of a southern accent while we were there. Yes, it is embarrassing when I find myself doing it, but it really is subconscious. At least it doesn’t happen after watching tv or I might have to give up Downton Abbey on Sunday nights.

Just as my ear is swayed by a dialect I am immersed in, I’ve noticed my cooking goes through changes depending on what I expose myself to. It could be the cookbook I am currently reading, a food styling shoot I was recently on, the people I live with, or the city I find myself in. I’d never tasted spätzle until my husband, who’d lived in Germany for a year, introduced me to it. Now it’s a regular at our dinners. Seven years in Brooklyn gave me a fluency in Bialys, baklava, knishes, and egg creams. While my friend Allison (who is Jewish and Italian) introduced me to Matzah Balls, Borscht, Chopped Liver, and Brisket.

Beef brisket, carrots and potatoes

Allison’s Brisket (she has more than one, but this is my favorite) is something I make infrequently because it is so melt-in-your-mouth delicious you tend to keep eating until eventually you find yourself in a  catatonic lump on the couch. You can adjust the soporific effect of this dish by eating it with heaping spoonfuls of horseradish. With winter ever so slowly giving up its hold on us (yes, I still have a few patches of snow in the yard) I decided to make brisket last week. It might make you sleepy, but it is one of the ultimate comfort foods, and guaranteed to take the chill out of winter.

Brisket ready to braise in the oven

For those of you who are uninitiated in the ways of brisket here are a few things to keep in mind:

  • Allison suggests using the First cut. Second cut isn’t second-rate, it just has more fat.
  • You don’t need to brown the meat, but you can if you want to.
  • Pay attention to your liquid levels – too much and it’s soup, too little and it’s dry.
  • Brisket is always better the next day, it really is.

Adding vegetables to brisket

If you want to know more about the dos and don’ts of brisket cooking you can read here or get Stephanie Pierson’s  The Brisket Book. A Love Story with Recipes. In my original recipe I was told to use “tons of onions”, hmmm tons. I love onions so I use a lot (though not quite a ton). It depends on the size of your pan and your tastebuds. So without further ado:

Allison’s Brisket

2-3 pounds onions, peeled and sliced

6-8 pounds Brisket, first cut if you want it a bit leaner

16 ounces beef broth

16 ounces water

1 bottle chili sauce  or  1 cup catsup and 1/2 cup horseradish

1/3 cup Worcester sauce

1/3 cup Dijon mustard

14 medium size carrots, peeled and cut into short lengths

8 medium potatoes, peeled and cut into large cubes

Preheat the oven to 325°F. I had two pieces of meat and used a long shallow pan. Since I didn’t have any chili sauce I subbed in catsup and horseradish, which tasted fine. Basically you add everything in the ingredient list, in the order they are written above, stopping when you get to the carrots and potatoes. I wasn’t using a lidded pot so I covered it all with a sheet of parchment paper and then crimped a huge piece of aluminum foil on top. If you have a lidded braising enameled cast iron pan you can use that.

I did sear the meat first, but when I talked to Allison she later said she doesn’t bother with that step any more, so it’s your choice. Bake for three hours. Add your carrots and potatoes, recover and bake another hour.

At this point you have two choices. You can dig in, but you won’t get nice, pretty slices, or you can be patient, let it all cool down, slice the meat across the grain when it is cold the next day, and reheat the pretty slices. To be honest I do not have the patience nor self control.


3 Comments

Filed under 50 Recipes

Be Brave Brownies

There are times when I forget how much bravery and faith it takes to step into the kitchen some days.

No one is born knowing how to cook. Everyone knows how to eat from day one, but producing the meals which get consumed over a lifetime is a learned skill. Some people master those skills early on and for them cooking becomes like a second language. Others acquired their culinary skills as needed – when they get their first apartment or in my Mom’s case, when she married and had a family to feed. I’ve noticed that for some of those late kitchen bloomers the joys of cooking are abundant while others simply tolerate their time in the kitchen because there is a need both to eat and feed people. For me being around food and cooking is akin to breathing. I do it unconsciously. There is a comfort level I’ve attained both from my love of food as well as from the hours and hours I’ve stood in front of a stove.

folding in chocolate to oatmeal batter

I don’t want to sound cocky because it wasn’t always this intuitive. I enjoyed learning to cook, but I also had to work at it. There were such spectacular failures along the way its amazing I ever took up a spatula again. For some people completely losing their eyebrows in a gas oven lighting fiasco might have turned them away from food, or at least from cooking on gas appliances, but not me (and it turns out eyebrows do grow back and you really shouldn’t wait three minutes to strike the match once the gas is on). There was a memorable visit to my parent’s kitchen from the Manlius Fire Department after I had accidentally set the stove top on fire using my new wok. The disasters have given me pause, but not frightened me out of the kitchen. There have also been some foods I’m not entirely comfortable around. Ok, I’ll say it – there are a few foods which have scared me because they were strange (offals) or dangerous (spun sugar) or had a reputation for being complicated and temperamental (chocolate). Yup, I said chocolate.

Chocolate and I go way back. I adore chocolate so much I think it should have its own line on the food pyramid. I consume some nearly every day. When we were first dating my husband noticed this obsession and asked what would happen if chocolate were illegal. I replied that he would be visiting me in jail with a file baked into a vanilla cake. Really, did he think if chocolate were illegal I would abstain from it??? Silly man. Life without chocolate? Unthinkable. I love chocolate. The thing is chocolate in some forms can be temperamental. It can seize if you add liquid at the wrong moment or turn grainy if not heated properly. There are so many ways it can misbehave. More to the point I just hadn’t tried to make many chocolate desserts beyond the classic Nestlé Toll House Chocolate Chip cookie. Even my Mom who doesn’t love being in the kitchen is able to whip up a chocolate mousse which is so velvety smooth and deliciously chocolatey you ask for seconds and then thirds. I was a chocolate wuss.

ghirardelli unsweetened chocolate

This hesitancy towards chocolate was quickly noted by my two bosses at the Leaf ‘n Bean Café after they hired me as their baker. Alan and John explained they expected me to have at least one chocolate item on the dessert menu every single day. “Sure, no problem,” I told them as I inwardly said to myself, “Shit, shit, shit what am I going to make?” One of the waitresses took pity on me and gave me the recipe for the best chocolate cake ever. A regular customer at the café heard about my conundrum and slipped me the recipe for her no fail brownies. What I quickly learned was you didn’t need to be afraid of chocolate – you just need a good recipe and a little faith.

It turns out that most chocolate desserts aren’t hard or scary. I’ll grant you making fancy chocolate that needs to be tempered is tricky, but there are so many chocolate dessert recipes which are “Easy Peasy” as Jamie Oliver says. If you are craving gourmet chocolate bonbons there are plenty of fabulous chocolatiers out there who can make them for you. I am particularly fond of L.A. Burdick. Beyond the fancy stuff I suggest you take a deep breath, find a good recipe, and head into the kitchen.

chocolate chip brownies

For everyday chocolate consumption it doesn’t get much simpler than brownies. Practically fail proof*, quick to make, as well as delicious, home-made brownies are as easy to whip up as their boxed Betty Crocker cousins. Brownies are the all American chocolate equivalent of apple pie, and like apple pie you can notch them up by serving them à la mode.

Here’s a tip from Maida Heatter on how to line your brownie pan with foil. Spread a sheet of foil over the outside of the pan and press the foil to follow the shape of the pan. Then slide the foil off and flip the baking pan over. Gently nudge the pre-formed foil into the inside of the pan and secure the ends by wrapping them over the edge of the pan.

forming the foil insert

Brave Brownies

I wish I remembered the customer’s name who gave me this recipe all those years ago. I’d like to thank her all over again for the kindness she showed to me when I was learning to navigate my way into a daily routine of chocolate desserts. Perhaps these should be called Thank You Brownies.

1 stick of unsalted butter (1/2 cup)

2 ounces unsweetened chocolate, roughly chopped

1 cup sugar

2 eggs

1 teaspoon vanilla extract

1/2  – 2/3 cup flour (moist to cakey)

1/4 cup cocoa (optional)¹

pinch of salt

a handful or two of extra bits like chocolate chips, chopped walnuts or dried cherries

Preheat the oven to 350ºF. Flip over a 8″ x 8″ baking pan and smooth a sheet of foil over the outside – I have gotten very fond of non-stick foil recently. Gently lift the foil which is now shaped like your pan place it into the inside of the baking pan. Since the foil has the overall shape of the pan it should be easy to snug it in. The foil will make removal of your finished brownies, and clean up, a snap.

In a small saucepan heat the butter and unsweetened chocolate until melted over a low heat. Give it a stir every so often as they’re melting, then set aside to cool when both the chocolate and butter are melted.

In  medium bowl beat together the eggs, sugar and vanilla. Add the melted butter and chocolate. Finally stir in the flour, cocoa (if using) and salt. I beat it 50 times which is the number from the back of a box of brownie mix. Silly, but one of my quirks. You can simply beat until combined and then pour into the pan. If you want to add any “extra bits” you can either fold them in or sprinkle them on top.

Bake 22-27 minutes or until a toothpick inserted into the middle comes out with just a few crumbs on it. Cool for at least 20-30 minutes before trying to cut because warm brownies will cling to the knife.

oatmeal flour

Gluten Free Brownies 

Many years ago I worked with a food stylist who was starting to transition from food styling to writing cookbooks. I remember three things about Carol Gelles – her generosity to her assistants; her telling me about the deal she had with God when it came to dirty dishes – she washed and he dried; and lastly her recipe for oatmeal brownies. Back then I didn’t think of them as gluten-free, but they are made with oat flour so this is a perfect alternative for any of your friends who have an intolerance or sensitivity to gluten. If someone has a severe allergy make sure you get oats that say they are gluten free. This version is pretty much the same brownie recipe if you look at them side by side.

1 stick of unsalted butter (1/2 cup)

2 ounces unsweetened chocolate, roughly chopped

1 cup sugar

2 eggs

1 teaspoon vanilla extract

3/4 cup oat flour (made from 1 cup oatmeal)

1/4 cup cocoa (optional) ²

pinch of salt

a handful or two of extra bits like chocolate chips, chopped walnuts or dried cherries

Preheat the oven to 350ºF. Flip over a 8″ x 8″ baking pan and smooth a sheet of foil over it. Gently lift the foil off then gentle the foil into the inside of the pan to make getting them out of the pan easy.

In a small saucepan heat the butter and unsweetened chocolate until melted. Give it a stir every so often until both are melted, then set aside to cool while you put together the other ingredients.

In medium bowl beat together the eggs, sugar and vanilla for three minutes. To make the oat flour process the oatmeal in a food processor until you have flour 3-6 minutes depending on your machine. Add the oat flour and salt to the melted butter and chocolate. Stir that mixture into the beaten eggs and sugar. If you want to add any “extra bits” mix in a few handfuls into the batter or sprinkle them on top.

Bake 33-38 minutes or until a toothpick inserted into the middle comes out with just a few crumbs on it. Cool for at least 20-30 minutes before trying to cut because warm brownies will cling to the knife.

oatmeal gluten free brownies

* I will give someone out there the benefit of the doubt that they could somehow screw these up, if only to be perverse or because they tried to mess up.

¹ Having made these brownies for every school event since writing this post I have decided I really like a small amount of cocoa added in. Since cocoa is similar in texture to flour you may want to consider reducing your total amount of flour used so the brownies don’t get too cake-y. Also my preferred brand is Ghiradelli, which while more expensive than regular cocoa is well worth the extra cost when it comes to taste.

² I have been adding a small amount of cocoa to the oatmeal variation too since it is gluten free and similar in texture to flour. As I mentioned in the previous recipe my preferred a high end brand such as Ghiradelli. 

PS – These brownies have been so easy to make I’ve been making them (and tweaking them) twice a week for the last two months. One of my favorites was when I had some left over cocoa powder and chocolate truffle filling. I chilled the chocolate truffle filling then chopped it into little chunks and mixed that along with the Valrhona cocoa powder into the batter. Because I didn’t think to take some of the flour out to compensate for the cocoa I added these brownies were more on the cake-y side, but the chocolate flavor was amazing. Here is one of my variations –

M&M chocolate brownies ready to bake

4 Comments

Filed under 50 Recipes

DIY Pizza

I’m from New York and my husband is from Chicago which should mean we don’t speak the same language when it comes to pizza, but we do. That’s because we don’t debate thin crust vs. deep dish we take our pizza discussions straight out to the grill. Grilled pizza seems to be something everyone can agree on.

"grilled pizza"

I first learned about grilling pizza from Lou Ekus about 20 years ago. Lou can grill or smoke just about anything – pig, peach or pizza. He and his wife Leslie were the owners of Holy Smokes, our favorite BBQ restaurant which was located in a deconsecrated church in Hatfield where the wait was often long but always worth every bite (unfortunately the restaurant burned to the ground five years ago). Grilling pizza was simple Lou explained, you simply divide the grill in two. The coal side was for cooking the pizza dough and the non-coal side for melting the cheese.

"pizza dough grilling looks like moon bread"

My friend Allison gave me a fool-proof pizza dough recipe that I’ve adapted slightly. Add a big salad and plenty of nibbles because people have to take turns and you have a fantastic DIY dinner. Last night the kids invited their friends Richard and Clay over and here are some of the results:

"Clay's pizza"

Clay building his pizza

Clay had come out to the cape with us a few weeks ago so we knew there would be some post-cooking addition of hot sauce (his consumption of hot sauce and soy sauce are legendary) to whatever pizza he built. Luckily for Clay our neighbor Joyce had just sent over a jar of her home-made hot sauce.

"Joyce's hot sauce"

Clay’s older brother Richard turned out to be a man of contrasts. Shredded mozzarella and fresh mozzarella, red sauce and pesto, pepperoni and chicken sausage.

"Richard's pizza"

Russell tried peppers for the first time, which surprised me. Pizza as a conveyance for unloved foods? Hmmmm….. That is however one of the things I most love most about a DIY dinner – people can be as picky or not about what they make and eat and it’s not a big deal. It also works because you can accommodate a variety of dietary needs with little fuss. In our family we have cheese eaters and non-cheese eaters so there is always regular mozzarella and soy mozzarella. Last night the cheese eaters actually hit the trifecta with shredded mozzarella, fresh locally made mozzarella, as well as fresh goat cheese.

"Russell's pizza with peppers"

Russell’s pizza with peppers

Isabelle listened to Russell’s advice of “add lots of sauce” and created a very juicy pizza.

"Isabelle's sauce-y pizza"

Sauce-y and delicious

It was stretching it to make DIY pizzas on one grill for six people. Fortunately we had a giant salad and plenty of fruit to nibble on as we waited our turn. Isabelle made the dough for us, but you could also buy it as many grocery stores carry decent pizza dough in their prepared food or freezer sections. The rest requires little prep, mostly putting things in bowls for people to choose from. Here’s what I put out last night:

Red Sauce

Pesto

Sautéed Onions

Black Olives

Green Peppers

Garlic Chicken Sausage

Pepperoni

Goat Cheese

Shredded Mozzarella

Fresh Mozzarella

Soy Mozzarella

You could add just about anything you like or have at hand. Need some inspiration? Take a peek at one of our favorite pizzeria’s list of toppings (scroll to the bottom).

Pizza Dough

1 cup warm water

1 package yeast (you can use slightly less if you make the dough well in advance and give it plenty of time to rise)

1 Tablespoon honey

1 pound flour – I mix white with whole wheat, plus extra for kneading

3-4 Tablespoons olive oil, divided

1-2 teaspoons salt

Put honey in warm water and sprinkle yeast over it to proof. Mix flour, salt, and 2-3 Tablespoons of the olive oil together. When the yeast has proofed (gotten all foam-y) dump into the flour mix and combine. When you have a mass of shaggy dough take out and start kneading. Keep going for about ten minutes. Oil the bowl you mixed the dough in, roll the dough ball to coat lightly with olive oil, and cover with a tea towel. Let rise until double.

To make pizzas punch dough down and grab a fist size piece. Roll out thinly. Grill on one side. You will know it’s cooked when you see crazy bubbles all over the top. We call it moon bread, though if it looked like the surface of the moon there would be craters not bubbles. Then you can do one of two things. If there are just a few of you and you can arrange to have all the toppings next to the grill you can flip the half-cooked dough to the non-coal side of the grill and add your toppings right there. Cover until the cheese has melted and the other side of the dough has cooked. If you have a bigger crowd you may want to cook the dough on both sides then place it on a cookie sheet* and give it to people to top as they wish. When the toppings are complete slide it back onto the grill (non-coal side), cover and cook until cheese has melted.

"Crazy bubble moon bread"

Crazy big bubbles

For the four of us I usually make a single batch of dough. I double it as we invite more people over. You can always freeze the dough or use any that is leftover to make calzones for the next day’s lunch. To make a calzone roll out the dough a smidge thicker than for pizza and top half with sauce, cheese, and anything else you might want to stuff inside. Make sure to leave a 1/2″ edge to the dough that doesn’t get any sauce on it. Fold the dough in half and squeeze the seam shut. Let rise for 15 minutes or so. Bake in a 400ºF oven for 17-26 minutes (depending on how much stuff you put in there) or until the dough is brown and looking cooked. Calzones are a perfect lunch to eat on the go because they are self-contained.

"Shawn building a pizza"

Shawn building a pizza

* A cookie sheets really are better than jelly roll pans like the one above since you can slide a pizza off a cookie sheet, but you need to negotiate the lip of a jelly roll pan.

P.S. One time our DIY meal was so successful we ran out of dough (embarrassing) and ended up using some tortillas instead. All things are possible when faced with a hungry crowd asking for more. The lesson learned was you can never have too much dough.

3 Comments

Filed under 50 Recipes

The Best Chocolate Cake Ever

After graduating from college one of my first  jobs was as the baker at Leaf n’ Bean Cafe in Brooklyn Heights. I brought with me a rather slim batch of recipes. Prior cooking jobs had always handed me house recipes to use. No muss, no fuss just bake and serve. This was the first time I had been asked to supply my own recipes. The cafe was open for breakfast and lunch plus weekend brunches so the baked goods were pretty straight forward–muffins, cakes, pies, the occasional mousse, and bar cookies fit the bill. The glitch came around chocolate. The owners John and Allan wanted something chocolate on the menu every day, which makes sense since chocolate sells. The problem was that while I ate a lot of chocolate I didn’t have many chocolate recipes in my repertoire back then (my, how things have changed). My rescue came in the form of  Continue reading

13 Comments

Filed under 50 Recipes