Tag Archives: Summer

100 Pounds of Cherries

Clouds over WhatelyI have to say it’s been a delightful summer so far. Beautiful days with blue, blue skies full of enormous cumulus clouds, and nights cool enough to need a light blanket. It’s almost as if I’m in Maine not Massachusetts, and I like it very much. Of course Mother Nature has had a few bitchin’ days here and there. It’s as if she morphs into a menopausal menace who forces everyone to live through her horrendous hot flashes made up of 98º F which she then combines with 98% humidity; because you know if Mamma suffers, than everyone has got to suffer. Fortunately those nasty days have been fairly limited, and for the most part I get to start each morning listening to the birds sing and the bumblebees buzz in my hostas. A few days ago I was treated to a viewing of the proverbial birds and bees when I watched a pair of hummingbirds fly from my nasturtiums to my morning glories and then on to the hostas, fighting as they went of course since that is what hummingbirds do, while dozens of bumbles sedately moved from one hosta stem to the next, occasionally stopping by the other flowers to test their tastiness. It was actually thrilling to see both birds and bees seeking nectar and pollen from the same plants.

Morning Glories and Nastursium

A bonus to this pleasant weather is that I’ve actually felt like turning the stove on to cook. Unlike summers past where it has been so hot I’ve felt like I was melting (and as a result of that heat I whined about the temperature a lot – like here and here and here), it has actually been okay to bake things. Which is good because I have been on a sour cherry binge. You think I’m kidding, but I’m not. I have been going to the farmer’s market every Saturday and bringing home baskets upon baskets, and then case upon case of sour cherries from Outlook Farm.Outlook Farm cherries

Some of the things I’ve done with this massive amount of sour cherries has not needed any heat. My Sour Cherry Gin Jings which are made up of muddled sour cherries, a squirt of simple syrup or maple syrup, a shot or two of gin, sometimes juice/sometimes not, all topped off with some seltzer and mint are made on the counter or sometimes out on the deck as the sun is setting. Quite refreshing and no heat required.

Sour Cherry Gin Jings

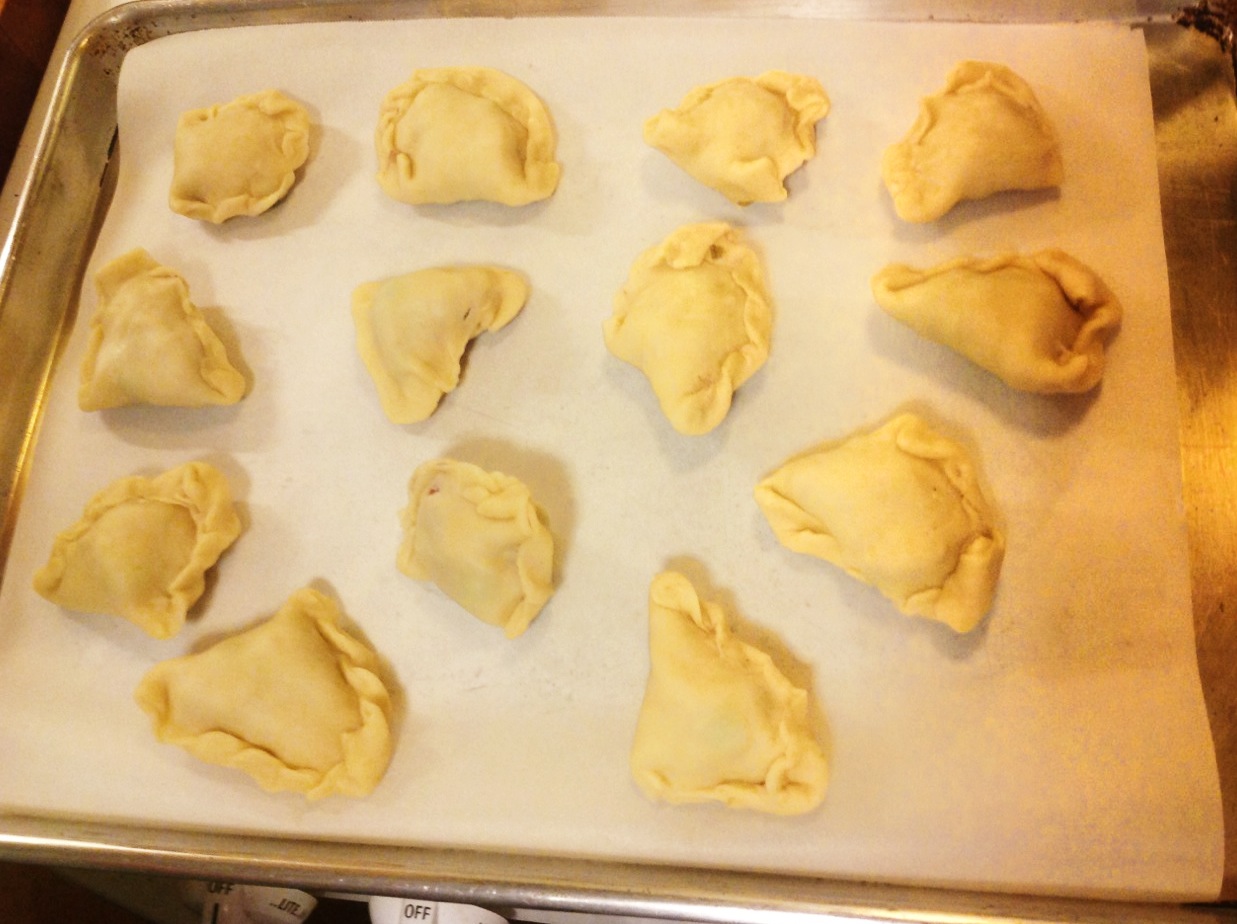
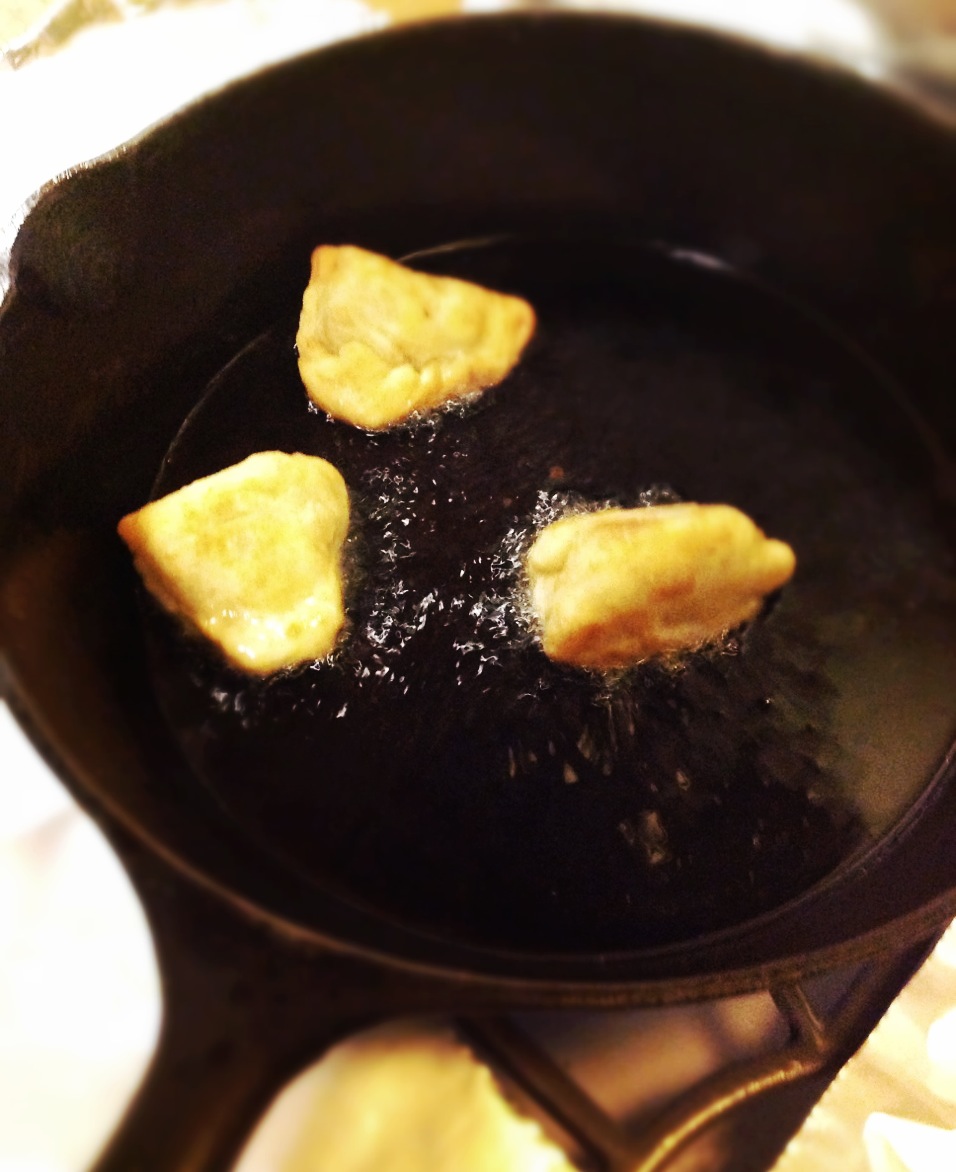
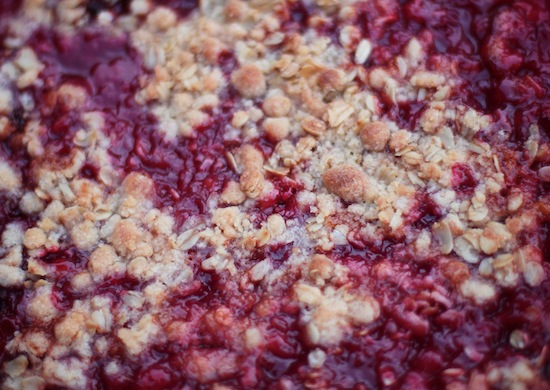
Mostly I’ve been working on a pretty stellar Sour Cherry Crumble. I know, I know you want to get our your tiny violin and play some sad songs for the suffering I’ve gone through this past month taste-testing six I mean seven, well actually nine sour cherry crumbles. I also whipped up a batch of Sour Cherry Hand Pies to pack in a picnic Isabelle, Russell, Vivian, and I took to The Clark Museum*. They were lovely, but needed more filling according to my intrepid taste testers and myself. Basically it’s been a month of sour cherry feasting.

What I’ve come to learn is that while most berries are juicy, sour cherries seem to explode with juice. This juiciness necessitates a few alterations to how one would normally approach a berry dessert. If you treat the sour cherries like a blueberry for instance, and just toss them with some sugar and flour, then sprinkle with a crumb topping you’ll watch in fascination and horror as the cherry juice first bubbles up and over the pie plate (more so than any blueberry ever could). This juice-ifying can be at times so violent that it will even eject whole cherries from the pie onto the baking pan (which you hopefully put under your pie plate because if you didn’t you’ll be scrubbing the bottom of your oven for a week). As the cooking continues the cherry filling proceeds to swallow the crumb topping like a molten sea of red lava before the topping ever has a chance to brown and crisp up. The first time I watched this happen it reminded me of the cheesy special effects of a Godzilla movie.

My solutions to this sour cherry juiciness are two-fold – first use a bigger (or at least deeper) dish and second pre-cook the filling a bit before proceeding with the pie or crumble making. I can already hear the whining, “But do I really have to take this extra step?” To which I answer, “Read the paragraph above.” Do you really want to deal with sour cherry ooze?

Making sour cherry pie filling

The other thing to note about cherries, sour or otherwise, is that they have pits, and you must get rid of said pits before you make a pie or crumble or cocktail. This is a tedious job which can be made less tedious by listening to a book on tape. Something like Jane Austin’s Pride and Prejudice or whatever book strikes your fancy (I certainly don’t expect everyone to be an Austin fan, but trust me when I say a book or podcast will help the process go faster). Our library system now offers ebooks and audio books which you can download onto your tablet or computer. This means you will never be without a book to read or listen to as long as you can charge your device, which is cause for a happy dance in my opinion.

I’ve written before on this blog about not wanting to own kitchen tools that only serve one purpose. One hundred pounds of cherries later I do wonder if I should break my rule and invest in a cherry pitter. My knitting group certainly recommended I think about it as they scoffed down multiple helpings of a gluten-free sour cherry crumble I made for them (everyone in my knitting group is GF, with the exception of moi). Maybe next year I’ll invest in a pitter. Or not.
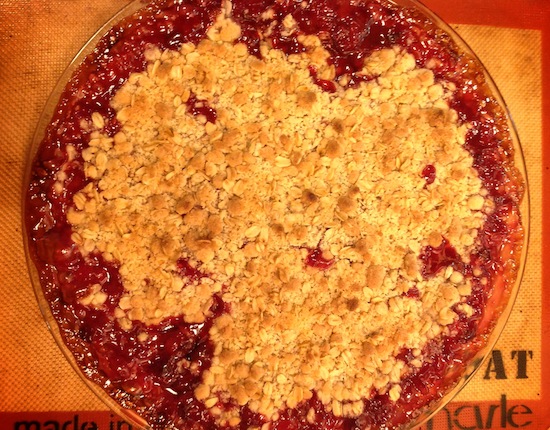
Sour Cherry Crumble PieSour Cherry Crumble

Filling:

1 quart sour cherries, pitted

3/4 cups sugar

juice of 1/2 small lemon

1/2 – 2  Tablespoons corn starch

Topping:

2/3 cup flour (or same amount as cup4cup GF “flour”)

2/3 cup old-fashioned oats

2/3 cup sugar

1/2 teaspoon cinnamon (optional)

3 ounces (3/4 stick) margarine or butter

If you’ve already pitted the cherries you can start with the recipe.  If not turn on your book on tape or favorite CD and pit away. Don’t bother wasting the energy of preheating the oven while you pit.

In a medium size saucepan stir together the cherries, sugar, cornstarch and lemon juice. Heat over medium high heat, stirring occasionally, more towards the end than at the beginning, for 14 – 20 minutes or until mixture starts to thicken and has bubbled away for several minutes. Don’t let the mixture burn, because it will if you don’t attend to it, and you did after all just spend a whole heck of a lot of time pitting those cherries, so burning would be bad.

After the mixture has been started to bubble around the edges of the saucepan preheat the oven to 400ºF. Once the mixture has thickened and cooked a wee bit scrape it into your pie plate. As I said before I found it helpful to use something slightly larger than you’d normally use for a fruit pie. An 8″ square Pyrex pan is a good choice. So is a 12″ round pie plate. All my pie plates are glass or ceramic, so I don’t know if the acidity from the cherries and lemon juice would react to a metal pie plate. Better not to find out is my advice. Set your pie plate on a jelly roll pan which has been lined with parchment paper or a silpat mat. Even using the bigger pie plate/dish there will still be some spill over.

Pop in the oven for 45 minutes and then start to make your topping. Do this by rubbing the margarine (if you’re serving people who have dairy allergies or are vegan) into the flour/oatmeal/sugar mix with your fingertips until it is crumbly and had lumps the size of peas. If the cherry pie has been in the oven about 10 – 15 minutes carefully sprinkle the crumble over the top, making sure you do not dump too much in any one spot. If you like less crumble that this recipe makes simply sprinkle on what you like and freeze the rest for another pie or to put on top of muffins. Continue baking the pie until the topping is nicely browned and the sour cherry goo has bubbled up (hopefully not over too much) around the edges of your topping. When everything is brown and bubbly and smelling divine remove from the oven and cool.

Sour cherry pie

Here’s something I learned from SCC #8 – if you try to eat this right out of the oven it will be like soup. Plus chances are very good that you will burn your mouth, even if you try to eat it a là mode. So be patient and wait for it to cool down, then enjoy.

Sour cherry pie about to be gobbled up

*If you are around western Massachusetts this summer it really is worth your time to take a trip over to the The Clark Museum. They have a lovely Van Gogh exhibit, along with James McNeill Whistler’s Arrangement in Grey and Black No. 1 which I was thrilled to see, plus they are showing the winning Super Bowl art wager (on loan for three months from the Seattle Art Museum) – Albert Bierstadt’s Puget Sound on the Pacific Ocean. Oh, and they recently finished an exquisite renovation of their building so that it now has this series of gorgeous reflecting pools, plus plenty of picnic tables for enjoying your lunch outside at.

Vivian at Clark Art Museum

4 Comments

Filed under 50 Recipes

Turn Up the Heat

We’ve been thinking a lot about driving lately. Isabelle takes her driving test today. Russell is studying for his permit test. Which means everyone is learning about stuff they didn’t know. Like how to parallel park (trickier than you might think), how tinted the windows of your car can be (35% who knew?), and what to do if your car starts to skid out of control (don’t break and steer into the skid). The last one got me to thinking that if you should turn your car into a skid does that mean when the weather gets nasty-hot outside should you turn up the heat in your food?

Last week the weather was brutal. One friend wrote on her Facebook wall –

“Even in this putrid, humid heat, I’m reading all kinds of status updates of people running 5 miles, biking, etc…and I’m just sitting here thinking how proud I was when I went and got the mail without fainting.”

That pretty much sums it up, surviving this most recent heat wave feels like an accomplishment. The question is how do you cook dinner when walking into the kitchen causes you to break a sweat? Do you serve popsicles and plates of uncooked food? In part that has been my default strategy – when the temperatures are close to 100° I stop actually cooking (which is ironic since many restaurant kitchens I’ve worked in were 101° + in the summers). But if you apply the skid rule to food then when the temperatures soar you should turn up the heat in your food rather than trying to make it colder. In counties where it is really hot the cuisines often have a spicy component to them. Think of Indian curries and tandoori or the hot jabanaro peppers used in Mexican cuisine. It’s not that everything from these cuisines will burn your tongue off, but taking a bite of something that makes you sweat seems to counteract the heat outside.

hot peppers

So I’ve been adding more zip and spice to our food. Extra raw garlic in the pesto, and hotter peppers in our Samosas. Samosas are savory Indian pasties meant to be served as an appetizer or snack. My gang likes them so much we make a meal of them. Our favorites are the Aloo Samosas which are filled with potatoes, peas, onions, and plenty of spices. In the winter I use jalapeno peppers and bake the samosas in the oven. The more traditional method is to fry them, which I do in the summer. I also use cayenne or Thai peppers (easy to grow or find them at most farmer’s markets) to bring up the spice level in the warmer months. Despite the main ingredient being potatoes these little pockets of yummy are full of flavor – coriander, garam masala, fresh ginger, and of course hot peppers. This recipe is a tweaked version of Julie Sahni‘s from her book Classic Indian Cooking.

Baked potato samosas

Potato Samosas

Dough

3 cups flour

1 teaspoon salt

1/2 cup solid vegetable shortening

1/2 – 3/4 cups cold water

Put the flour, salt and shortening in a medium bowl. You then want to rub the fat into the flour so you take some flour in your hand and a little shortening and smear them together. You keep doing this until all the fat has been smooshed between clumps of flour and all the flour has bits of shortening in it.  Then add around 1/3 cup of cold water and mix. Keep adding more water until the dough comes together. The amount of water depends on the weather/humidity so start slow and work up. You don’t want the dough oozing, nor do you want it crumbling. When you think you’ve got it right knead the dough for about 10 minutes. If it feels a bit dry dribble in more water. It should be as soft as a baby’s bottom when you’re done kneading. Wrap it in plastic wrap and let rest for 30-60 minutes.

stuffing samosas

Filling

1  1/2 pounds potatoes, cut into chunks (7-8 medium)

1 medium to large onion, chopped into small pieces

2 teaspoons minced fresh ginger

2 teaspoons ground coriander (or you can use the seeds)

2  1/2 – 3 teaspoons garam masala

5 tablespoons vegetable oil

2-3 fresh chilies (jalapeño or Thai), seeded and finely chopped

1-2 Tablespoons fresh lemon juice

2  1/2 – 3 1/2  teaspoons salt

1 generous cup peas, or more if you like peas

Boil the potatoes until you can easily slide a fork or knife in them. Peeling (or not) is up to you. While the potatoes are cooking sauté the onion, ginger, coriander, and garam masala in vegetable oil. Your nose will go into hyperdrive at this point. When the onions are soft, add the chilies. Depending on which chilies you use your eyes may start to water. Once the potatoes are cooked, drain them and throw them into the sauté pan with the cooked onions, you may need to crumble them with your fingers to make them smaller – you don’t want mashed potatoes, nor do you want large chunks which can break through the dough. Add the salt and lemon juice to taste. When you’ve had two or three tastes stir in the peas and taste once more.

baking samosas instead of frying

If you’re baking the samosas turn the oven on to 400°F and line a jelly roll pan with parchment paper. If you’re frying them get out a cast iron fry pan and fill it with 1″ vegetable oil. To make the samosas you’ll need some flour for rolling out the dough and a bit of water to seal the pastries. Cut off large walnut size lumps of dough and roll into a 5″ circle. Cut in half and scoop a generous Tablespoon of filling into the half circle. Dab a little water along the cut edge and pinch the seam together. Then with a little more water dabbed on the curved edge fold it over and seal. You’ll have a lumpy little triangle-esque form.

frying samosas

Depending on your cooking method either place samosas on the jelly roll pan or into the hot vegetable oil. If you’re baking them drizzle with olive or vegetable oil and bake 30-40 minutes, flipping once and adding more oil if necessary. The look and texture of the dough is different from baking (they’re not fried after all), however they are still very yummy.  If you’re frying them have the oil at medium high and cook until all sides of the samosa are a golden brown. Drain on paper towels. We like to serve them with chutney.

potato samosas

This weather has been intense. Our Sumac Deforestation project is on hold because I’m worried we’d all suffer from heat stroke. I’ve been fantasizing about moving somewhere near the arctic circle. That sounds nice and cool. Also rereading this post and this one from last summer. What are you doing to stay cool?

Leave a comment

Filed under 50 Recipes

Gilding with Strawberries and Chocolate

16 candles

Somebody in our house turned sixteen this past week.

You might think summer is the ideal time to have a birthday, but in many ways it’s not – at least not while you’re a kid or teenager. Summer birthdays can be a pain. The thermometer usually reads in the 90s which means icing and ice cream tend to melt. School’s out so many of your friends are away at camp. Even if your school is really thoughtful and tries to celebrate folks who have summer birthdays with a half birthday it doesn’t always work out. Not if your real birthday is after graduation and your half birthday is during Christmas vacation. So someone in our house hasn’t had a friend birthday party in a while, but he has always had a family birthday party.

the birthday hat

In our house the family birthday means four things. One is you get to choose the dinner menu. Two you must wear the hat. Three you will get a cake, and four we will sing you the song. The exception to these birthday rules is our dog Oliver. He gets a partially cooked hamburger instead of a cake and doesn’t have to wear the hat since his head is so small. Of course that means he has a Pavlovian reaction anytime we sing the song since he now associates it with hamburger. What can I say? He’s smart, but not smart enough to know that not every birthday is his birthday.

strawberry chocolate cake

So for Russell’s birthday this year I got up early to bake the world’s best chocolate cake. I just wasn’t sure how to decorate it and the birthday boy had given me free range in the icing department. Fortunately his godfather Rick Ellis called mid-morning to talk to the birthday boy. After wishing him a happy birthday he asked what kind of cake Russell was having. My son’s response was, “I don’t know. I think it’s something chocolate-you should talk to my Mom.” For those of you new to this blog I should mention Rick is an amazing food stylist, a fantabulous cook, and always has inspired recipe ideas.

chocolate cake chilling

Developing a recipe or food concept with Rick is like playing food ping-pong. We talked about what was in my fridge (strawberries, heavy cream, and a jar of raspberry jam) and cupboards (lots of chocolate, several different kinds of cocoa, and some honey), what Russell liked (pretty much anything), and then Rick pondered. For all of 30 seconds. Since strawberries tend to weep (let their juices out) when they have been cut Rick suggested a layer of raspberry jam on top of the bottom layer of cake with the cut strawberries nestled into the jam. Thus solving the weeping problem. If raspberries had been in season we could have used them, plus if I’d had an open jar of strawberry jam it would have worked too. Once the fruit component was in place Rick wanted me to add the second layer of cake and frost the entire outside with chocolate buttercream. To gild the proverbial lily, just before serving the cake I drizzled chocolate ganache over the the chilled cake. Brilliant, over the top summer birthday cake. Perfect for a sixteen-year-old.

Chocolate ganache frosting

Here’s what you’ll need to make an Over the Top Chocolate Cake.

  • 1 baked and cooled Chocolate Cake, click here for the recipe
  • 1 – 1  1/2 pints strawberries, tops removed and cut in half
  • raspberry jam
  • chocolate buttercream (I made mine from a half batch of this recipe substituting some Valrhona cocoa for part of the powdered sugar)
  • chocolate ganache

Place cake on a cake plate, spreading jam on top of first layer. Add strawberries (the amount will vary depending on if you make an 8″, 9″ or 10″ cake). Top with second layer and frost outside with chocolate buttercream. Refrigerate. Just before serving pour cooled chocolate ganache over the top, letting it run over the sides and puddle along the bottom. Add candles and sing the song.

Chocolate Ganache

4 ounces bittersweet chocolate, finely chopped

4 1/2 ounces heavy cream

2-3 heaping teaspoons honey

1 1/2 teaspoons butter

Bring the heavy cream to a boil and add the honey. Pour over chocolate and stir until the chocolate is melted. Add the butter and let cool till pourable being careful it’s not too hot that it melts the chocolate buttercream.

lighting the cake

6 Comments

Filed under 50 Recipes

Six Degrees of Separation Sangria

Six degrees of separation means everyone on earth is connected to everyone else by a “chain” of six friends. In the pioneer valley I joke we live in an area of two or three degrees of separation. This sangria is a classic example.

1. My daughter Isabelle went to Montessori with Isabel K., or the other Isabel,  as we call her.

2. Isabel K.’s mom Hilary and I became friends and now are in a knitting group together.

3. Hilary’s step father Bill was a master sangria maker.

4. Hilary’s step father was also a friend of my father. I met Mr. Catherwood several times when I was growing up without knowing anything about his step daughter Hilary or his delicious sangria.

I could have stopped at 3, but I just wanted to show you how wacky and wild things are in this six degree business.

"Bill's sangria"

I have a zerox copy of Bill Catherwood’s recipe in my kitchen drawer, though for most of the summer it resides beneath a magnet on our fridge. It’s so good I really don’t bother with other sangria recipes*, though there are plenty of them out there.

Of course me being me I’ve tweaked a few things. I use various red wines, often the inexpensive ones from Whole Foods or Trader Joe’s. You’re adding so many things to sangria you really don’t need to splurge on expensive wine. If you want to follow Bill’s recipe faithfully he called for Gallo Burgundy. Also I don’t always add the rum called for, mostly because I don’t always have it on hand. Seems great both ways.

Note this makes enough for a big party. You’ll probably need two pitchers, or will end up refilling one pitcher twice. If you want to cut the recipe in half I would simply halve all the ingredients except the fruit, I’d still stick with an orange, lemon, lime, and peach. My final suggestion is do not be tempted to use honey in place of the sugar. Even mild honey. It is yucky and even though you can drink sangria made with it you shouldn’t. Trust me on this, or ask my friend Lisa.

Six Degrees of Separation Sangria

1 gallon red wine

5 ounces rum (optional)

10 ounces club soda

1/2 cup sugar

1 orange

1 lemon

1 lime

1 peach

small amount pineapple juice

Dissolve sugar in large pitcher with club soda. Make long peels of the orange, lemon, and lime and put into the pitcher. Remove the pith (the white part of citrus) and chop fruit. Add the chopped citrus fruit to the pitcher, along with the peeled and chopped peach. Add the wine and rum and a splash or two of pineapple juice. Serve chilled with lots of ice.

I especially enjoy sangria outside on a sultry evening. The clouds this sangria evening were spectacular.

"Sangria drinking sunset"

*When Shawn and I recently went to the tapas bar in Northampton we got to choose from a dozen different Sangrias on their menu. It was a lot of fun, and we ended up with a carafe of watermelon sangria.

"watermelon sangria"I am curious to know what your favorite sangria recipe is. Care to share?

2 Comments

Filed under 50 Recipes

Friday is Pie Day

I have to be honest here I have been out of control lately. My kids are asking if I have a problem. Even my husband raises his eyebrows when I crank the oven to 400º F again. It seems I have a bit of a pie obsession. I can’t stop making them. It started when I was planning this post on pies. Friday Pie Day had a nice ring to it reminiscent of the rhymes in Nick Sharratt’s The Green Queen. Thing is I started making pies last Tuesday and it has stretched till today, Wednesday, well beyond Friday. Of course if I ruled the world every day would be pie day, at least in summer so perhaps there isn’t a problem.

"Blueberries"

Besides, how is any sane person supposed to ignore all the farm stands, farmer’s markets, and bursting blackberry bushes in their own back yard? It simply can’t be done. So I succumb to the fruits. The peaches from Clarkdale Fruit Farm and Atkins Farm, the blueberries from Golonka’s and Quontquont Farm. I’ve even found a few farmers who have managed to keep harvesting local strawberries and raspberries. Plus the first crop of tart crisp Duchess apples are in. Then there is my own backyard where the blackberries are ripe and ready. It really is impossible to not make pies.

"Peach crumble a la mode"

Just so we don’t get into an argument I want to be clear that my definition of pie is pretty broad. I happily lump crisps and crumbles into the category of pies. If you’re a purist, I’m sorry. If you want more complete definitions I suggest Richard Sax’s book Classic Home Desserts chapter 1. Apologies and disclaimers out-of-the-way here are the two main ways I’ve been making pies this week.

"peach raspberry fruit base"

I have been making a variety of pies this past week. Blueberry Crumble, Peach Crisp, Blueberry-Raspberry-Peach Rustic Tart. I even did a crazy Peach-Raspberry-Blackberry-Blueberry-Strawberry pie which was pretty fantastic. All of them start with a Fruit Base. A fruit base is what the name implies – fruit with a little bit of sweetener plus a little bit of thickener. What are the proportions? I can’t really tell you since it varies from variety to variety. Blueberries have been pretty sweet this year so I have dialed way back on the sugar I add. The early peaches are so juicy I’ve actually not been adding all their juices since I don’t want to end up with Peach Soup Crisp. I’ve been thickening with a Tablespoon or two of flour, but I know some cooks who like to use cornstarch. With these simple summer pies I haven’t used tapioca, though you could. Tapioca tames fruit juiciness quite well. For drier fruit pies like apple I don’t bother with the thickeners (just keep that in mind for fall). Sometimes I add a smidge of cinnamon. Or a squeeze of lemon juice. The main thing I do is taste before I pour the fruit base into the pie plate or crust. Just a nibble to let me adjust things if I need to. I have been making smaller pies so the proportions are roughly as follows:

Fruit Base

4 cups fruit (2 pints)

3 – 7  Tablespoons sugar, brown or white

1 – 2 Tablespoons flour

1 – 3 teaspoons lemon juice (optional)

1/2 – 1 teaspoon cinnamon (optional)

If you are using peaches give them a 10 second dip on boiling water to help loosen their skins. Peel and slice. Otherwise dump the fruit in with the sugar, flour and any seasonings. Your sugar amount will depend on the sweetness of the fruit you are using. The flour will depend on the juiciness as well as how juicy you like your finished pie. I don’t like my pies so firm the filling can be sliced and not move, nor do I want them swimming in their own juices. It’s all about personal preference. Then it’s a matter of if you want your crust on the bottom or top. Crisps or crumbles have the fruit on the bottom and the “crust” on the top. Rustic pies are crust on the bottom with fruit on top.

"pie juciness"

In either case bake at 400º F for about 45-55 minutes until the fruit is juicy and bubbling and the crust or crisp is browned nicely. I suggest using a jelly roll pan to place your pie or crisp on just so you don’t end up with any overflow juices dripping onto the bottom of your oven where they will sizzle, blacken, and eventually set off your smoke detector.

"Peach blackberry crumble"

The easiest type of pie I make are crisps or crumbles. If you’re unfamiliar with them they are simply a fruit base plonked in a pie pan or some other vessel topped with a mixture of butter, sugar and flour which has been rubbed into crumbly goodness. When baked this results in a juicy fruit pie covered with crunchy, crumbly topping. Add some ice cream and you may be approaching heaven. My Mom is famous for her deep dish blueberry crumble, which was one of the first pies I learned how to make. Over the years I have tweaked the crumble/crisp topping by adding oatmeal. Occasionally I’ve even substituted the topping from Magnificent Muffins onto a pie since it is essentially a crumble topping. My friend Laura B. made us a fabulous mixed fruit and berry crumble a few weeks ago whose topping included almond slices and minced candied ginger. Delicious.

"a la mode"

Crumble Topping

3/4 cup flour

3/4 cup oatmeal

3/4 cup white or brown sugar

1/2 cup cold butter or margarine (if you are making this dairy free)

pinch salt

1/2 teaspoon cinnamon (optional)

1/2 – 3/4 cup sliced almonds (optional)

Dump everything into a bowl and then rub the butter into the dry ingredients with your fingertips. You’re not trying to melt the butter, but simply to coat little chunks of butter with flour and sugar. You could do this with two knives or a pastry cutter. The mixture should be, as the name implies, crumbly. Nice fat crumbs the size of peas to small raspberries. I don’t recommend doing this with a food processor since the likelihood of over-processing is high. Also I tend to make this in the bowl I tossed the fruit in which serves two purposes. One it gives you less mess to clean up. Two it soaks up any lingering fruit juices that you didn’t get into the fruit portion of your pie. For the smaller pies you won’t use all this crumble topping. If you make a 9″ pie you will probably use it all. Depends on how thick you like your crumble. Bake as directed above, but don’t forget the jelly roll pan or you may have spillage in your oven.

* Now here’s a secret – you can make double, triple this amount of crumble topping and freeze it! Then any time you feel like pie, simply toss your fruit in some sugar and flour, pull out your crumble topping and sprinkle on a few handfuls and pop it all into a hot oven. Easy peasy!

"Laura's Mixed Fruit Crumble"

Rustic pies  are so much fun because you don’t bother with a pie plate, you just roll out the dough, plop the fruit on top, fold up the edges, and bake. They are elegant in their simplicity and I adore the fruit to crust ratio. The one draw back can be that pie dough scares some people. It shouldn’t but it does. Here’s some advice – #1 don’t over handle,  #2 think flaky and crispy, #3 stop worrying. The don’t over handle part is key. This isn’t bread dough so don’t knead it. If you use a food processor don’t let the dough form a ball in the processor. Over handling makes pie dough tough. My second point is using two fats. An easy to incorporate fat like vegetable shortening or lard combined with a tasty fat like butter. If you want to read more about flaky pastry I recommend the Pies & Tarts chapter of the 1997 edition of Joy of Cooking edited by Maria Guarnaschelli.

"Peach rustic pie"

Rustic Pastry

1 cup flour

2 Tablespoons cold butter

2 Tablespoons vegetable shortening

pinch salt

2 teaspoons sugar (optional)

2 Tablespoons ice-cold water, more or less

I like to make my pie dough in a food processor. I put the flour, sugar and salt in and pulse once. Then I add the butter and vegetable shortening and gently pulse. Do NOT switch it on. You are looking for crumbly pea size chunks of fat. Dribble on your water and pulse twice more. Give your dough a pinch. If it holds together dump it all out onto a piece of plastic wrap. If it doesn’t hold together dribble on a bit more water and pulse twice more. Once the dough is on the plastic wrap I squeeze it together with my hands, wrap it up, and pop it in the fridge. Do NOT knead. Let the dough chill and relax for a couple of hours or up to two days. This should be enough dough for the fruit base above. If you are serving a large number of people or you bought a lot of fruit double the recipe. After it has chilled roll it out on a floured surface making sure it isn’t sticking. Then roll the dough onto your rolling pin and lay it out on a parchment paper lined jelly roll pan. The dough may hang over the edges, don’t worry since you will fold it up after the fruit is on. Dump on your fruit base and fold up the edges. I often sprinkle the crust with some cinnamon sugar or coarse sugar for a little sweet crunch, but it’s optional. Bake as directed above. I often serve my Rustic Pies on wooden cutting boards.

"Pie dough pinch test"

This was a pretty epic post for something as simple as pie but I’m hoping that by sending it out on Wednesday you’ll be inspired to make some dough or crumble topping today, pick up some fruit tomorrow, then make some pie on Friday (Pie Day).

"all gone"

I’d love to hear what your favorite fruit and crust combination is.

8 Comments

Filed under 50 Recipes